Add PowerShell-7 preview to Windows Terminal in 30 seconds

Edit: The stuff below doesn’t work any more. But this new stuff works.

Fun times in Windows land over the last few days with the release of new previews of Windows Terminal (v0.4) and PowerShell 7 (Preview 3).

To celebrate, here’s a simple script that you can copy-and-paste into a PowerShell window to add PowerShell 7 to Windows Terminal. (You can even use the Windows Terminal PowerShell terminal. Wow!)

The whole thing might take 30 seconds, which is a significant improvement on my last effort of 2 minutes. Why not take 1 minutes 30 seconds to make yourself a drink?

Pre-requisites:

  • PowerShell 7-preview x64 is installed
  • Windows Terminal v0.4 is installed and has been run

Here’s what it looks like:

Here’s the code:

$terminalFolderPath = "$env:LOCALAPPDATA\Packages\Microsoft.WindowsTerminal_8wekyb3d8bbwe\LocalState"
# Get Windows Terminal settings file
$settingsFilePath = Join-Path $terminalFolderPath 'profiles.json'
$json = Get-Content $settingsFilePath | ConvertFrom-Json
# Get profiles
$profiles = $json.profiles
# Make a copy of first profile and configure for PS7 x64
$ps7 = $profiles[0].psobject.Copy()
$ps7.name = 'PowerShell 7-preview (x64)'
$ps7.commandline = 'C:\Program Files\PowerShell\7-preview\pwsh.exe'
$ps7.guid = '{' + (New-Guid).ToString() + '}'
# Download and set icon
$pwsh7IconPath = Join-Path $terminalFolderPath 'pwsh7.ico'
Invoke-WebRequest -Uri 'https://raw.githubusercontent.com/weebsnore/Add-PS7ToWindowsTerminal/master/pwsh7.ico' -OutFile $pwsh7IconPath
$ps7.icon = $pwsh7IconPath
# Write updated settings file to disk
$json.profiles = $profiles + $ps7
$json | ConvertTo-Json | Out-File $settingsFilePath
And here it is on GitHub.

Get Task Manager list of Apps with PowerShell

Over the past couple of years I’ve been impressed by a series of small improvements to the Task Manager which have made it pretty great to use.

I recently noticed that you if you right click the column titles in the Processes tab and tick all the boxes, you rarely have to venture to the Details tab. (The most valuable column to add, in my opinion, is Command line.)

The Processes tab also attempts to lump items into a few categories: Apps, Background processes, Windows processes.

How does it do this?

Luckily, Raymond Chen briefly explains what’s going on in a blog post from 2017.

To take Apps as an example: If the process has a visible window, then Task Manager calls it an “App”

Can we do something similar with PowerShell?

Probably. Kinda.

Here’s my attempt:

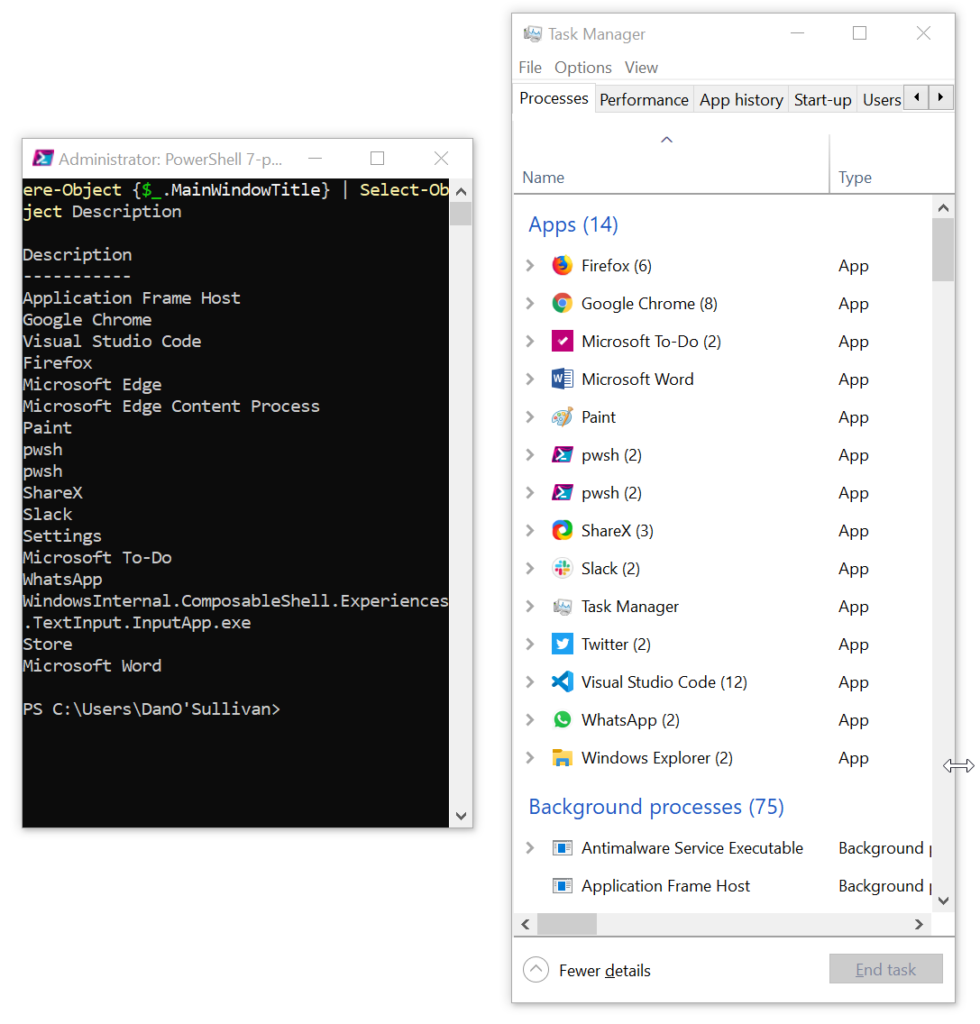
Get-Process | Where-Object {$_.MainWindowTitle} | Select-Object Description

And the result:

You can see that I get processes that have a MainWindowTitle and display the process Description.

The results are similar but not identical: PowerShell shows some bits of Windows internals that are displayed elsewhere in Task Manager.

Can you get any closer?

Tip: avoid Wait-Debugger gotcha on Azure Functions

My biggest gotcha with Azure Functions is that you need to put Wait-Debugger in your script for local debugging, and it’s easy to forget to remove it when you deploy to Azure.

My last post talked about exploring Azure Functions’ environment, and I mentioned that you could compare the cloud version with its locally-run approximation.

Well, when you’re running your function locally, the variable $env:AZURE_FUNCTIONS_ENVIRONMENT is set to Development.

This means you can ensure that you never leave a function hanging at Wait-Debugger in the cloud by wrapping it like this:

if ($env:AZURE_FUNCTIONS_ENVIRONMENT -eq 'Development') {
    Wait-Debugger
}

Another solution is to wrap your debug command like this:

if ($Request.Query.Debug -eq 'True') {
    Wait-Debugger
}

And then invoke your function with &Debug=True when you want to debug it.

How do you handle this problem?