Azure gives you a good amount of stuff free for 12 months when you sign up.
Quite tantalizing among these is a free Linux VM:

But if you make a B1S VM with the Ubuntu Server 18.04 LTS image, you start getting charged a trickle of cash for the disk. I amassed a bill of $1.26 before I noticed – quite shocking!
What’s up?
It turns out the 6 in P6 represents the size of the disk: 64 GB.
And the Ubuntu disk is only 30 GB. So you’re being charged for using too small a disk!
Luckily the fix is simple.
Start by creating your VM as normal:

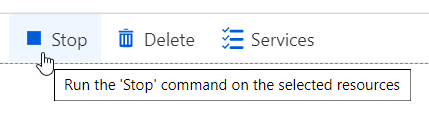
Once it’s been provisioned, Stop (Deallocate) the VM:
Then open your VM in the Azure portal and navigate to Disks -> click disk name -> Configuration.
Set Size (GiB) to 64 and click Save.
Then start your VM back up. It should now be free of charge – and you’ll have a bit more space to play with.